

 Tweet
Tweet
Hello everyone,
As promised I tackled the CV axle this weekend and below is how I did it. This is for a 2012 Abarth so the parts may vary between model years but the disassembly should be the same. The job took me about 12 hours with all the picture taking and learning a few things along the way. Plan for a full day of work but hopefully this will help anyone else tackling the job take significantly less time, less headaches, and save some money.
First of all: I am not responsible for any personal injury or damage to your vehicle but I would love to answer any questions you may have so feel free to PM me!
STEP 1: Purchased Parts & Special Items
2 jacks: scissor jack for car and floor jack for lifting wheel hub assembly
jack stand/ wheel chokes
something to release the locking points on the axle nut
36mm THIN WALLED socket (deep socket if you can find it): must be thin walled because the original one I have is to thick to fit into the wheel hub
breaker bar or long handled socket wrench: axle nut
13mm socket: brake caliper bolts
flat head screw driver wrapped in electrical tape: brake caliper
19mm socket: brake caliper bolts
12mm wrench or deep socket: wobble bolts
mallet and block of wood: break rotor free
10mm socket: rotor plate guard
15mm wrench/socket: socket to detach sway bar end link from strut
15mm socket and 17mm deep socket: remove strut from wheel hub assembly
wire cutters: cut off old boot clamp
Philips screw driver: remove small wheel well plastic panel next to engine
LOT of paper towels: clean up the tripod joint housing and surrounding area
10mm socket: remove or lower the plastic under carriage protector like you would during an oil change
EAR TYPE boot clamp tool & VERY dull wire cutters: clamping the boot clamp
STEP 3: Start and Finish
11 - Lower the jack back down, remove the axle nut using the 36mm socket and unbolt the wheel hub from the strut using the 15mm and 17mm sockets.

12 - Maneuver the wheel hub towards the rear of the car and down so you can pull the axle out. You will probably need to tap it at first to get it loose and then it should easily slide in and out of the wheel hub.

13 - Cut or twist the inner boot clamp off and pull the axle out of the car. I couldn't really get a picture while I was doing this but you can cut right at the crimp joint and twist in an upward motion.

As promised I tackled the CV axle this weekend and below is how I did it. This is for a 2012 Abarth so the parts may vary between model years but the disassembly should be the same. The job took me about 12 hours with all the picture taking and learning a few things along the way. Plan for a full day of work but hopefully this will help anyone else tackling the job take significantly less time, less headaches, and save some money.
First of all: I am not responsible for any personal injury or damage to your vehicle but I would love to answer any questions you may have so feel free to PM me!
STEP 1: Purchased Parts & Special Items
Front Passenger CV Axle Shaft: RL105679AA has superceded 68105679AA but will get the same part with either part number: https://moparonlineparts.com/mop-parts/#parts
Inner Boot Clamp: 68139370AA: https://moparonlineparts.com/mop-parts/#parts
Axle Nut: 06509729AA: https://moparonlineparts.com/mop-parts/#parts
Axle Nut Socket: Purchased at Orielly's
Hi-Temp Wheel Bearing Grease: http://www.oreillyauto.com/site/c/de...0417&ppt=C0139
Inner Boot Clamp: 68139370AA: https://moparonlineparts.com/mop-parts/#parts
Axle Nut: 06509729AA: https://moparonlineparts.com/mop-parts/#parts
Axle Nut Socket: Purchased at Orielly's
Hi-Temp Wheel Bearing Grease: http://www.oreillyauto.com/site/c/de...0417&ppt=C0139
DO NOT use CV grease on the inner tripod joint. the joint is more delicate and requires a thinner lubrication during operation
Ear Type Boot Clamp Tool: https://www.amazon.com/gp/product/B0...?ie=UTF8&psc=1
Torque wrench: https://www.amazon.com/gp/product/B0...?ie=UTF8&psc=1
STEP 2: TOOLS (listed in the order I used them)Torque wrench: https://www.amazon.com/gp/product/B0...?ie=UTF8&psc=1
2 jacks: scissor jack for car and floor jack for lifting wheel hub assembly
jack stand/ wheel chokes
something to release the locking points on the axle nut
36mm THIN WALLED socket (deep socket if you can find it): must be thin walled because the original one I have is to thick to fit into the wheel hub
breaker bar or long handled socket wrench: axle nut
13mm socket: brake caliper bolts
flat head screw driver wrapped in electrical tape: brake caliper
19mm socket: brake caliper bolts
12mm wrench or deep socket: wobble bolts
mallet and block of wood: break rotor free
10mm socket: rotor plate guard
15mm wrench/socket: socket to detach sway bar end link from strut
15mm socket and 17mm deep socket: remove strut from wheel hub assembly
wire cutters: cut off old boot clamp
Philips screw driver: remove small wheel well plastic panel next to engine
LOT of paper towels: clean up the tripod joint housing and surrounding area
10mm socket: remove or lower the plastic under carriage protector like you would during an oil change
EAR TYPE boot clamp tool & VERY dull wire cutters: clamping the boot clamp
STEP 3: Start and Finish
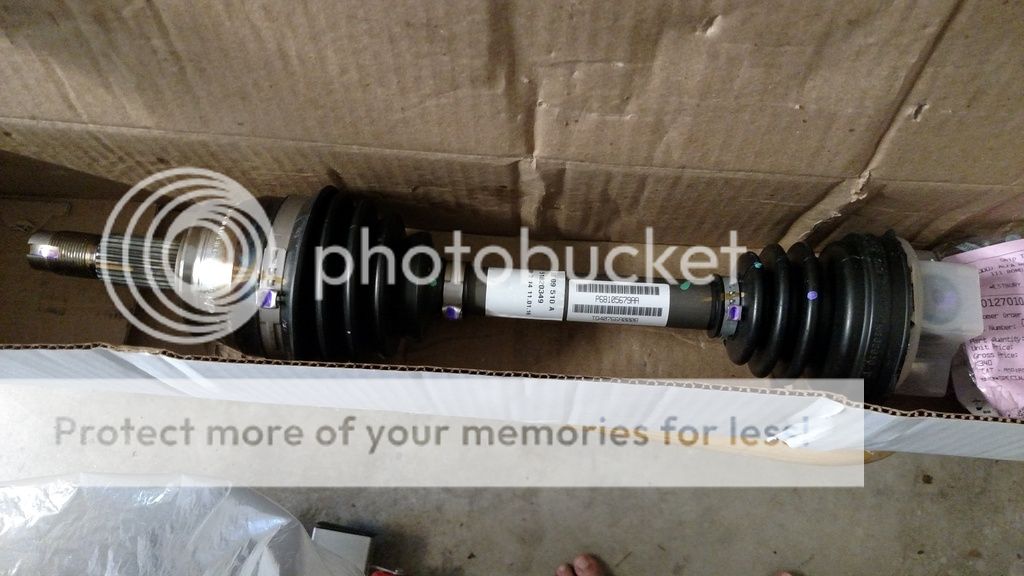
1 - Verify the parts ordered are the correct parts before starting! The axle has the old part number and the box the axle came in had the new part number. Either one should get you the correct part. I also ordered 2 boot clamps because they were pretty cheap.


2 - Unlock the axle nut with the tool of your choosing with a hammer. I used a pokey thingy that I honestly have no idea what it is actually for but my father had it in his tool box.


3 - Loosen the axle nut while the car still on the ground. My breaker bar is an 8 ft long piece of old swing set. I don't even have to try . Brother on the right and myself on the left


4 - Take the wheel off and do any jack standing/ wheel chokes that you deem necessary

5 - Undo the 13mm caliper bolts and then pry off the caliper with the flat head wrapped in electrical tape.


6 - Set the caliper on something towards the front of the car on a bucket

7 - Use the 19mm socket to take off the caliper bracket. These are tough so a mallet may be needed to break them lose.


8 - Remove the wobble bolts with a 12mm wrench and knock the rotor loose to remove it. Use a piece of wood to save the rotor.


9 - Remove the rotor guard with the 10mm socket


10 - Use the floor jack to lift the wheel hub so you can unbolt the top portion of the sway bar end link from the strut using a 15mm socket. FORGOT PICTURE, sorry
2 - Unlock the axle nut with the tool of your choosing with a hammer. I used a pokey thingy that I honestly have no idea what it is actually for but my father had it in his tool box.
3 - Loosen the axle nut while the car still on the ground. My breaker bar is an 8 ft long piece of old swing set. I don't even have to try
. Brother on the right and myself on the left4 - Take the wheel off and do any jack standing/ wheel chokes that you deem necessary
5 - Undo the 13mm caliper bolts and then pry off the caliper with the flat head wrapped in electrical tape.
6 - Set the caliper on something towards the front of the car on a bucket
7 - Use the 19mm socket to take off the caliper bracket. These are tough so a mallet may be needed to break them lose.
8 - Remove the wobble bolts with a 12mm wrench and knock the rotor loose to remove it. Use a piece of wood to save the rotor.
9 - Remove the rotor guard with the 10mm socket
10 - Use the floor jack to lift the wheel hub so you can unbolt the top portion of the sway bar end link from the strut using a 15mm socket. FORGOT PICTURE, sorry
11 - Lower the jack back down, remove the axle nut using the 36mm socket and unbolt the wheel hub from the strut using the 15mm and 17mm sockets.
12 - Maneuver the wheel hub towards the rear of the car and down so you can pull the axle out. You will probably need to tap it at first to get it loose and then it should easily slide in and out of the wheel hub.
13 - Cut or twist the inner boot clamp off and pull the axle out of the car. I couldn't really get a picture while I was doing this but you can cut right at the crimp joint and twist in an upward motion.


Comment